Nature - the pink challenge
A simple and plannable approach to the natural design of an artificial gingiva
With the increased popularity of implant-supported dentures in edentulous patients, “pink esthetics” are now also attracting more and more attention. Several options are available to accommodate the wish for customizing the sometimes visible gingival part. However, as always in dentistry, it requires good cooperation within the dental team.
The following report describes a simple, viable way to achieve a natural-looking, plannable design of the artificial gingiva. In terms of materials, only stained resins of different colors are used, which correspond to the quality of the base material. This ensures that no undesired discoloration or chipping of the characterization material occurs later on.
Nature is the role model
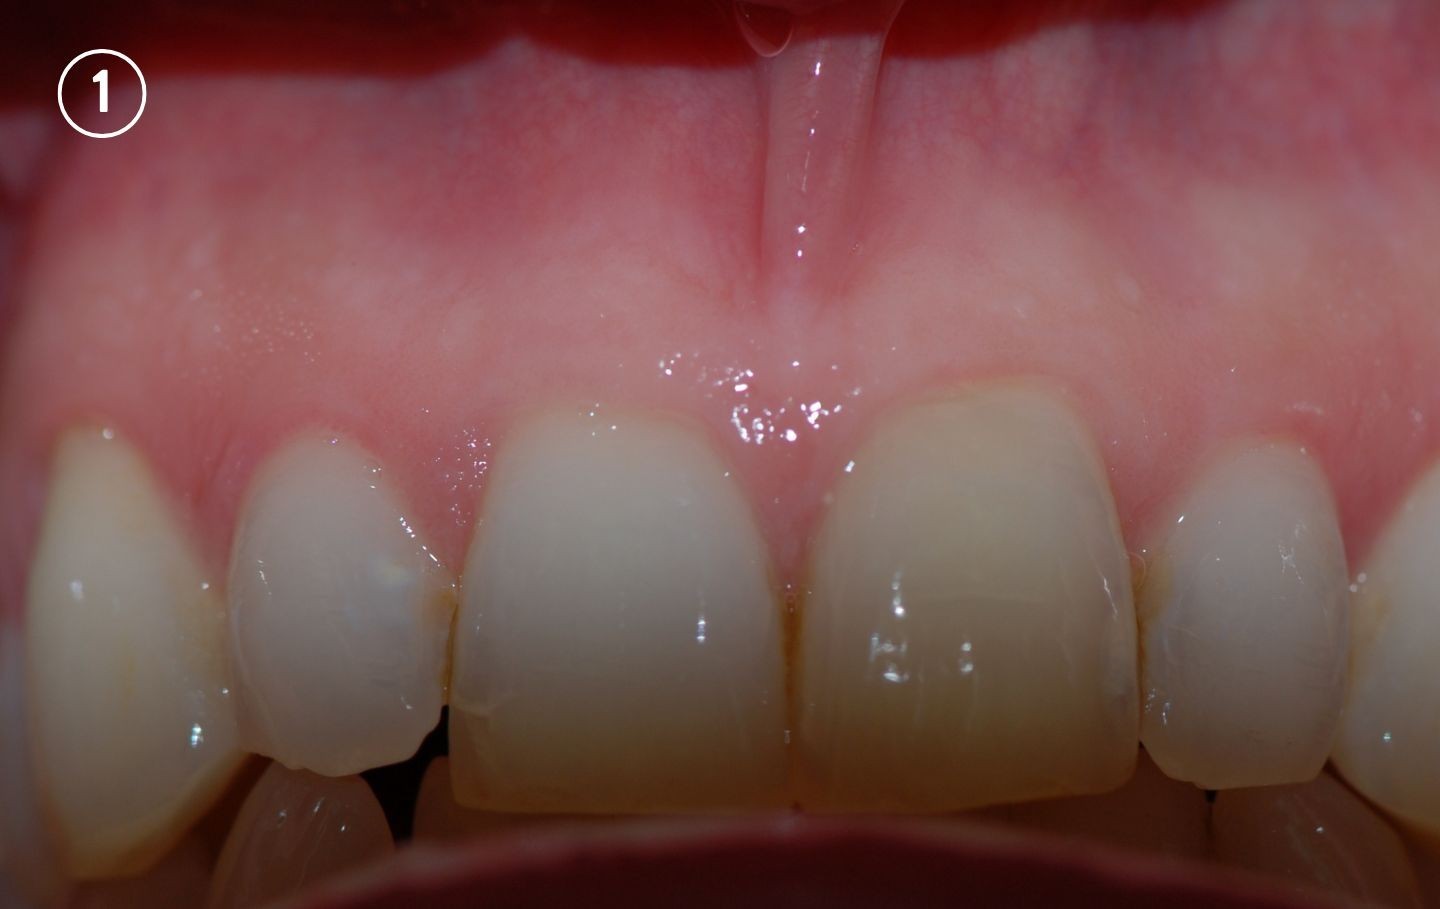
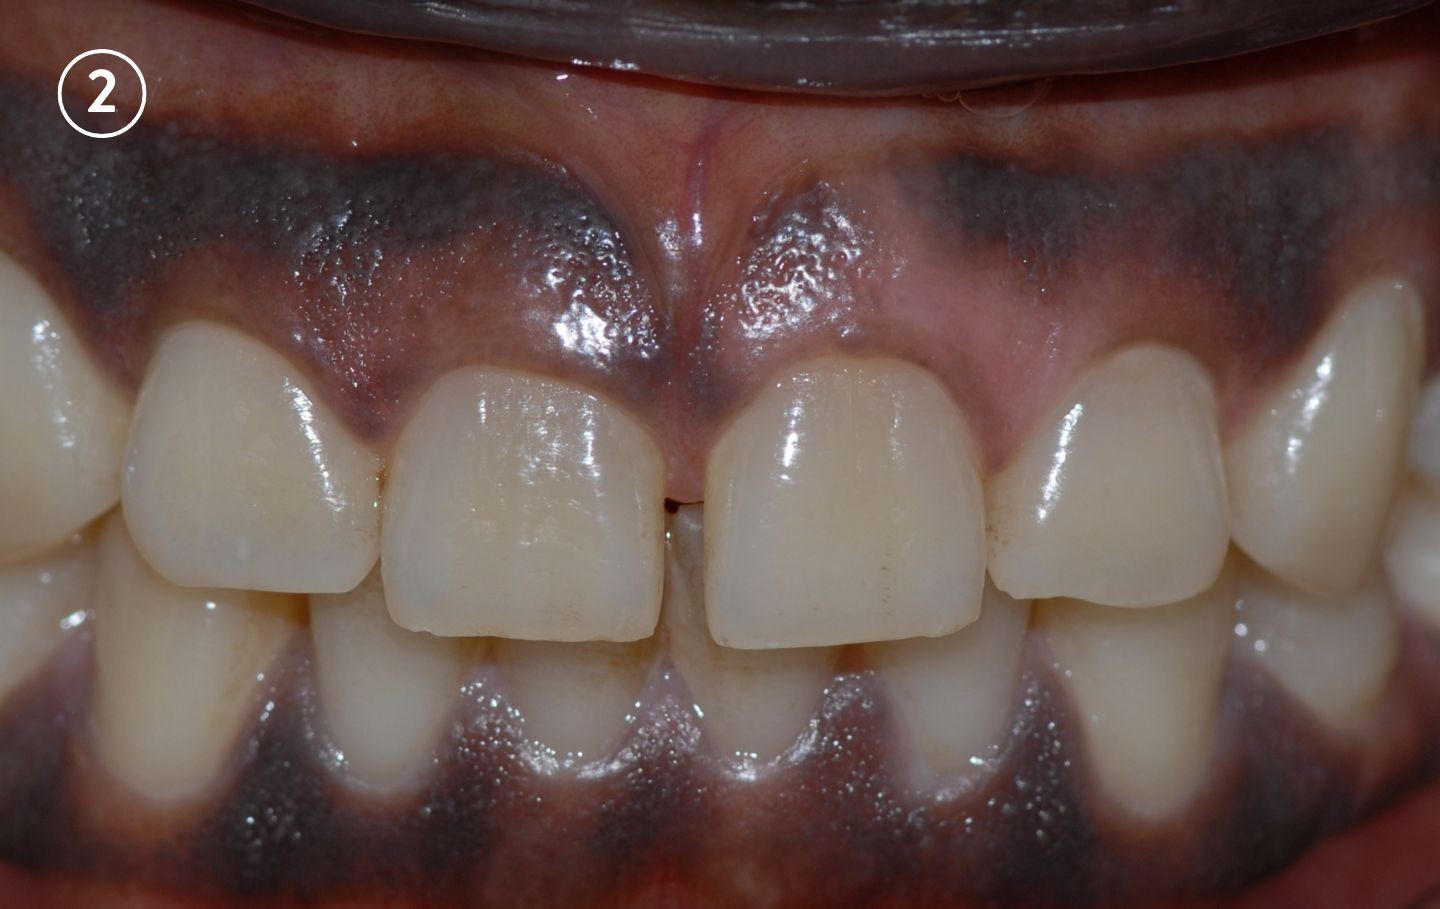
Before considering how to customize the resin, it makes sense to take a closer look at the different color shades of the natural gingiva. For example, one can observe that different ethnic groups also have gingivae with very differing colors, and these must be taken into account in the resin. It is also easy to see that there is no uniform coloration, but rather a zone with rather weak blood flow above the alveoli, which appears whitish pink, and zones with strong blood flow in the mucolabial fold, which are often dark red to violet in color. (Figs. 1 and 2).
Figs. 1 and 2: Comparison of gingival colorations
Material
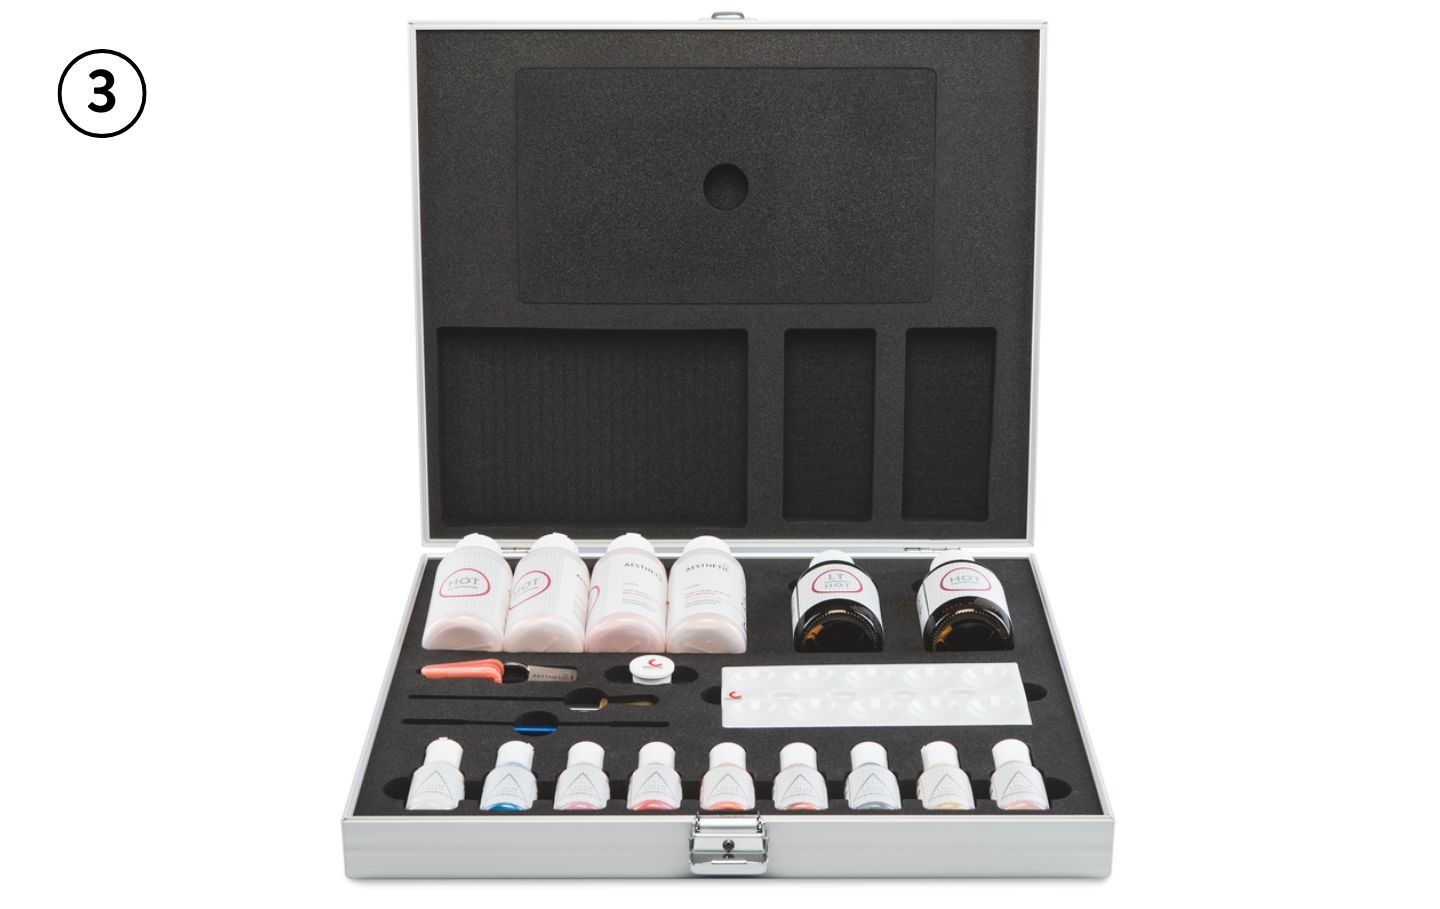
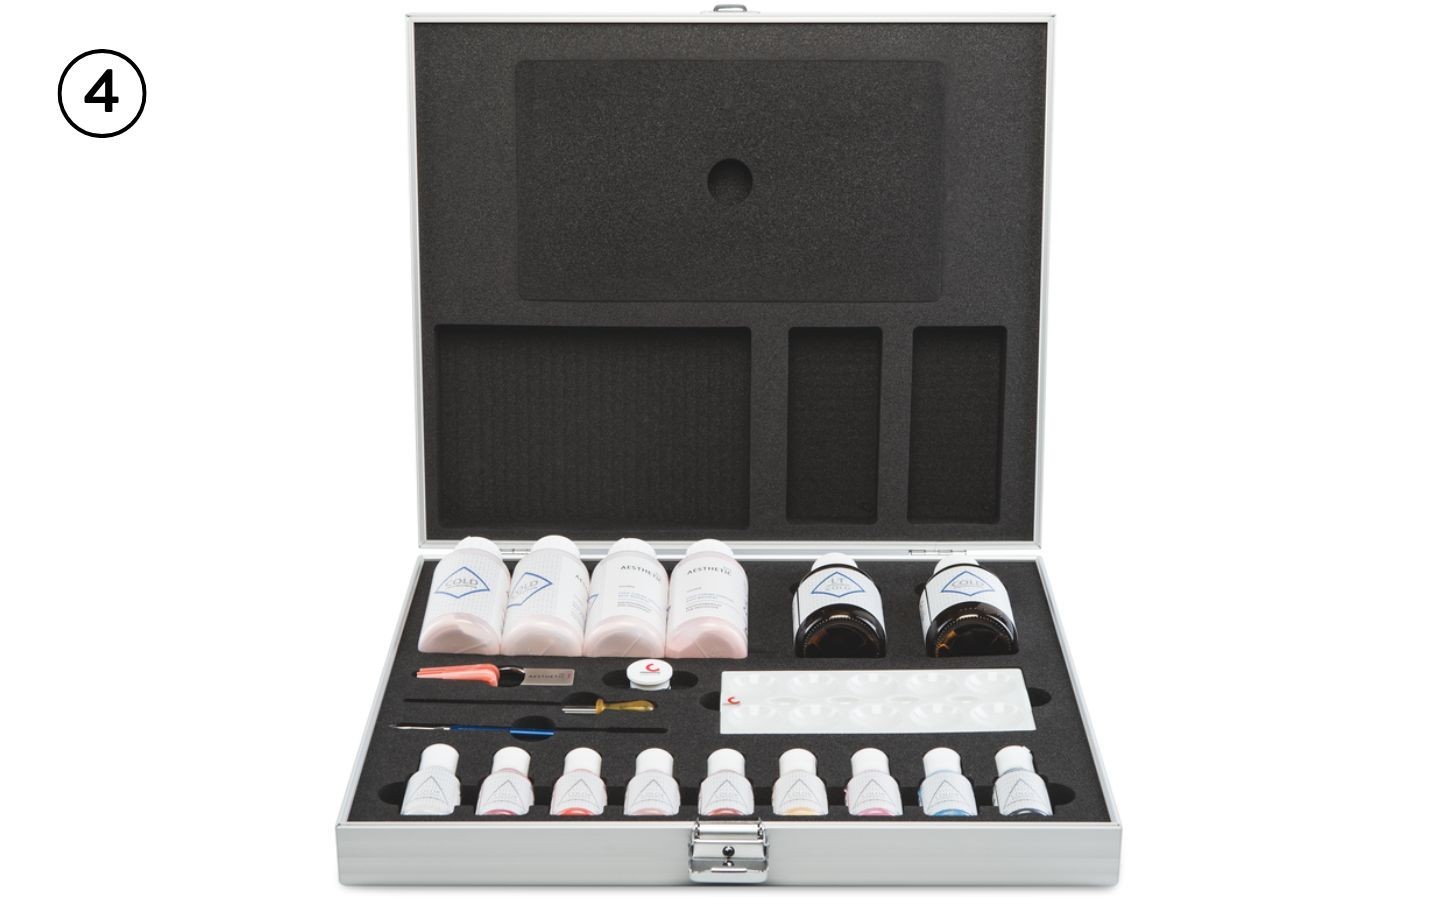
The AESTHETIC Color Set Easy offers a comprehensive range of options for characterizing resins. The set includes the three pre-mixed polymers 53, 55 and 57, as well as the base material 34. The following products are also included: a regular resin liquid, the LT modelling monomer, which allows for a longer processing time for characterization, intensive pigments, a resin shade guide, a porcelain mixing tray, a glass pipette, a modeling instrument and a jar of fibrils. The set is available for both hot and self-curing polymerization (Figs. 3 and 4).
Figs. 3 and 4: Customization material for hot and self-curing polymerization
Characterization according to scheme
The following four examples give suggestions for characterizing a denture base, whereby only pre-mixed polymers are used for the first three (soft stain 53, medium stains 53 and 55, strong stains 53, 55 and 57). For the fourth solution (individual) intensive stains are used. As these are only pigments, they must always be mixed with base material.
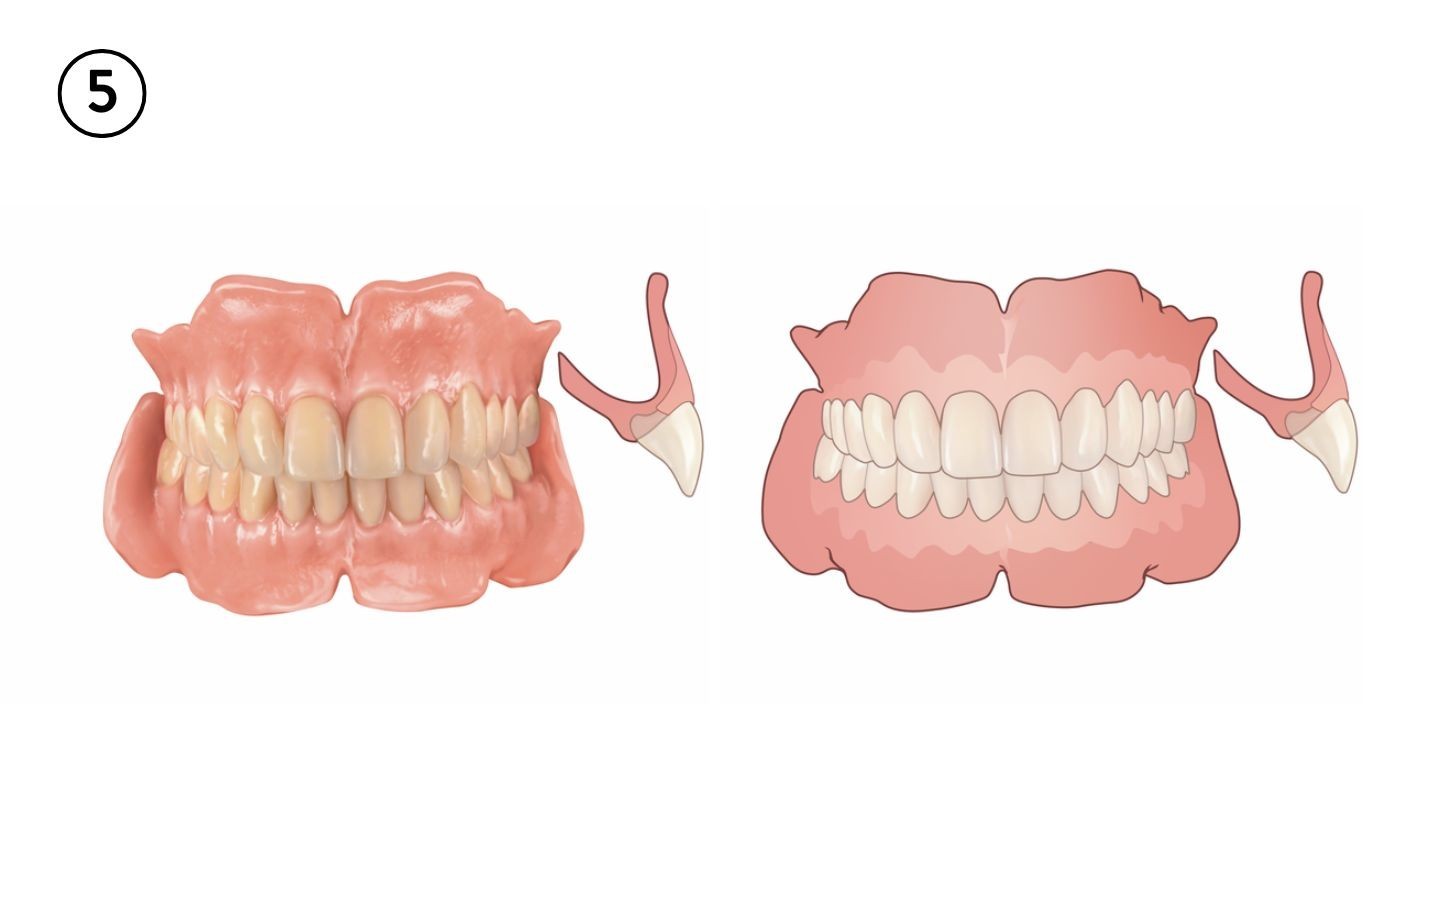
1 | Soft with stain 53
In soft characterization, only the marginal gingiva is stained. For this area, which is a light pink in color for a healthy gingiva, the pre-colored polymer 53 is used. Here, attention must be paid to ensure that the transition between the characterization resin and the base material is fluent (Fig. 5).
Fig. 5: Characterization pattern soft
2 | Medium with stains 53 and 55
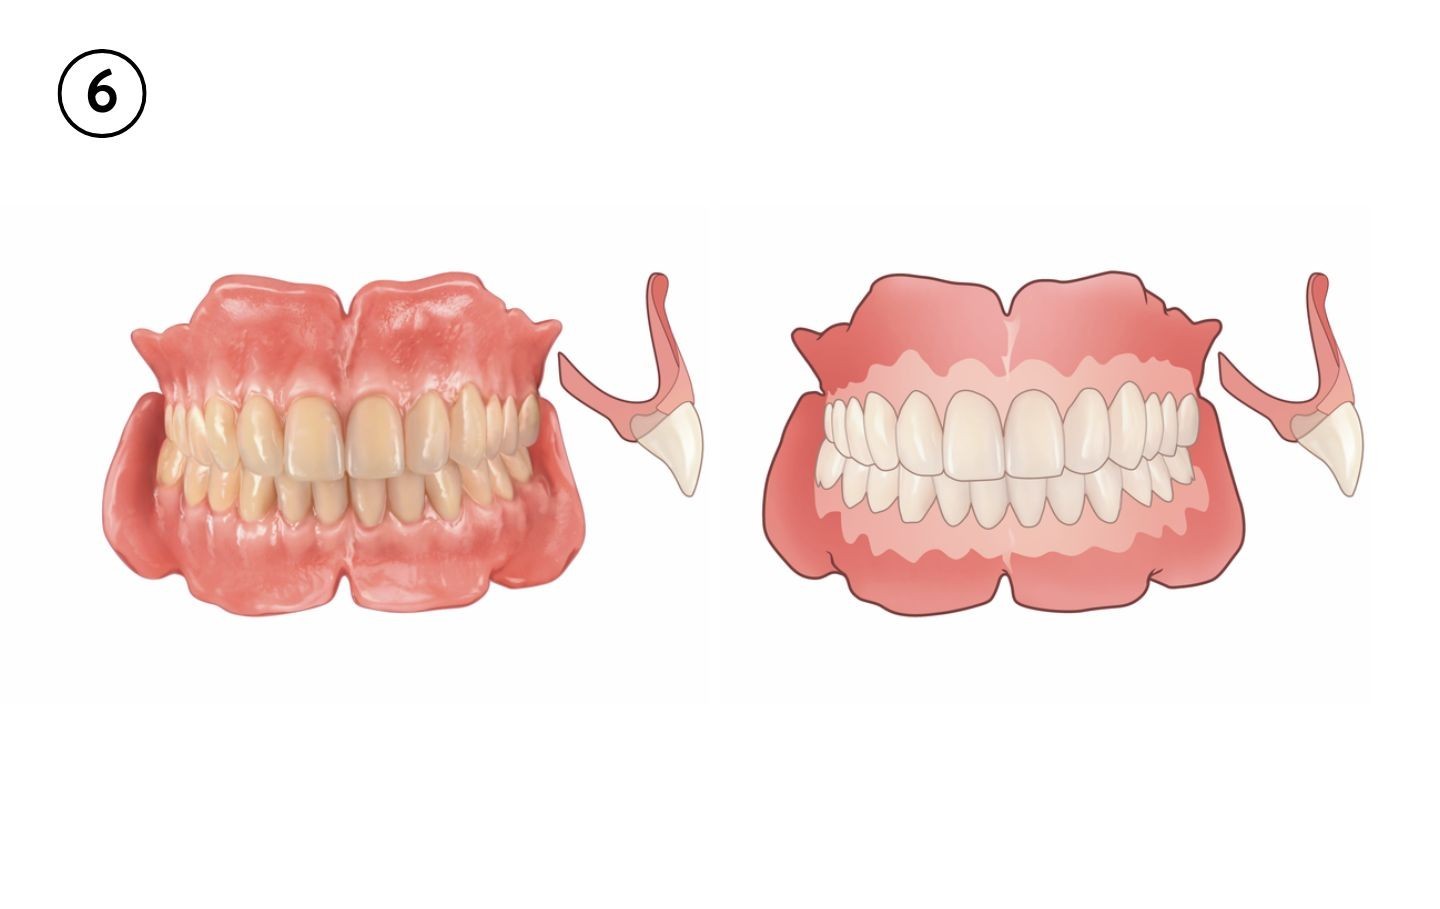
In the medium variant, the attached gingiva is also stained. For this purpose, not only the pre-mixed polymer 53 but also the intensely red-stained resin 55 are used. Here, too, attention must be paid to ensuring a smooth transition between the individual resins (Fig. 6).
Fig. 6: Characterization pattern medium
3 | Strong with stains 53, 55 and 57
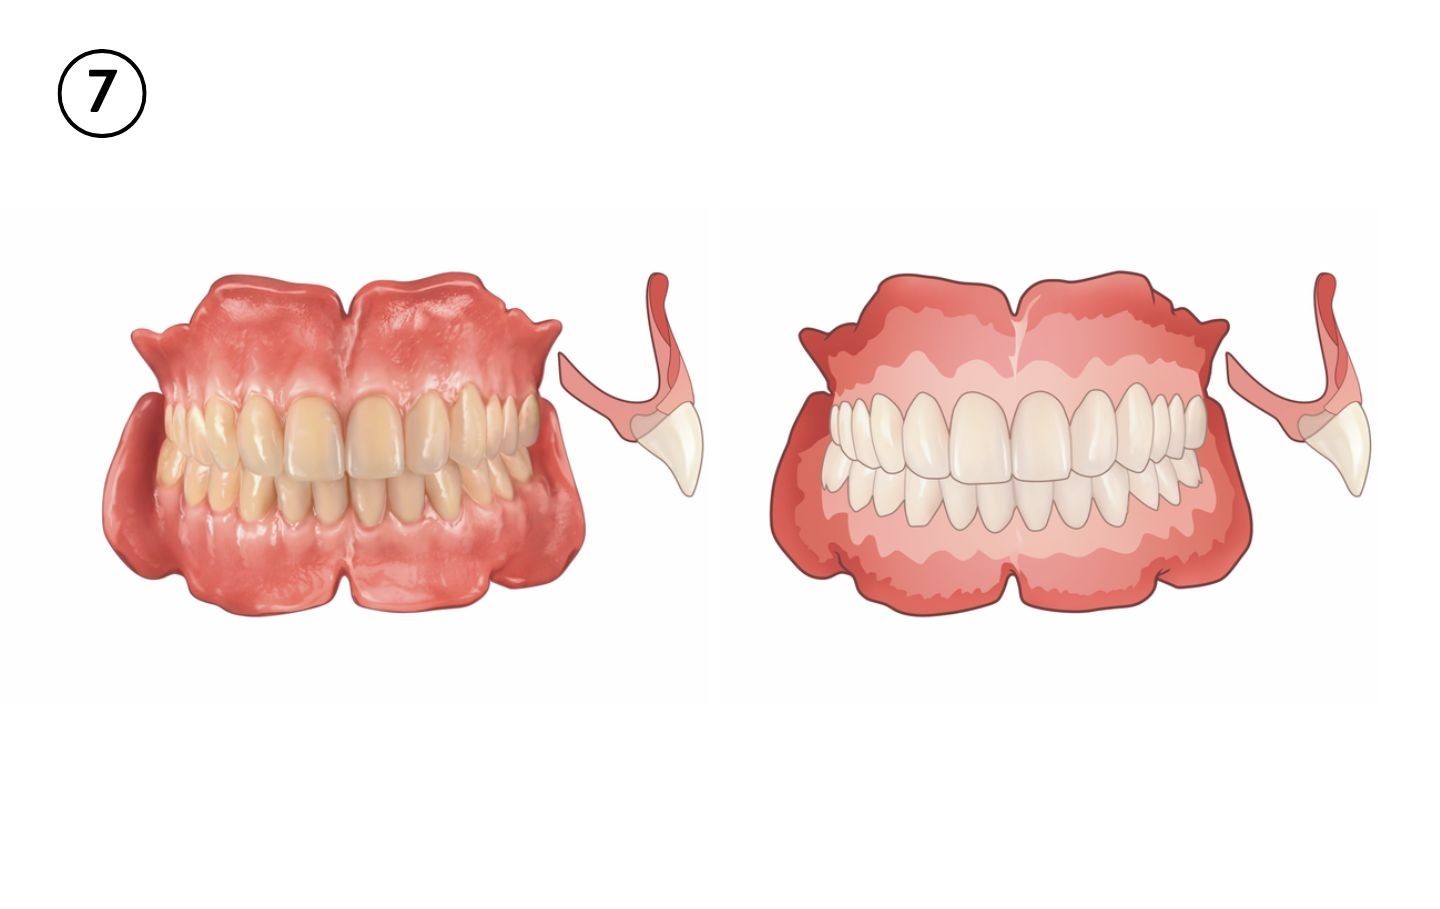
If the indication involves a very high smile line, the alveolar mucosa can additionally also be stained with a very dark, purplish-brown resin (Fig. 7).
Fig. 7: Characterization pattern strong
4 | Customized with intensive stains
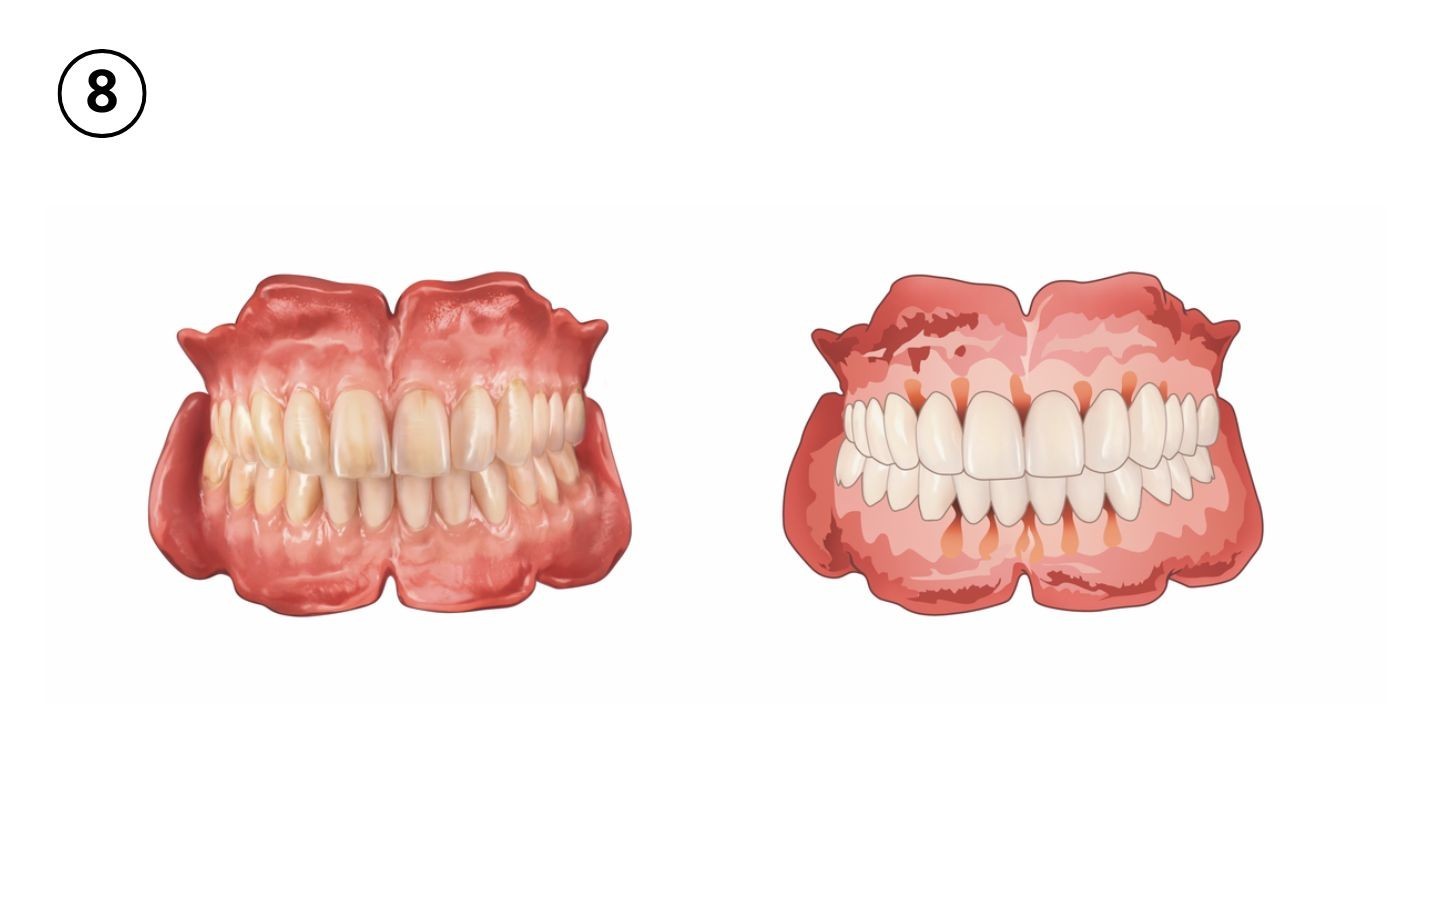
For this characterization, intensive pigments are available which allow staining the resins in all shades from white to black. These intensive stains are particularly suitable for patient cases where very good cooperation prevails between the dentist and dental technician or where the dental technicians can determine the stain themselves on the patient. In addition, clear resin can be used in the interdental spaces to prevent these “pink triangles” from forming in the interdental spaces. Nevertheless, the denture remains easy to clean (Fig. 8).
Fig. 8: Characterization pattern customized
Wax-up
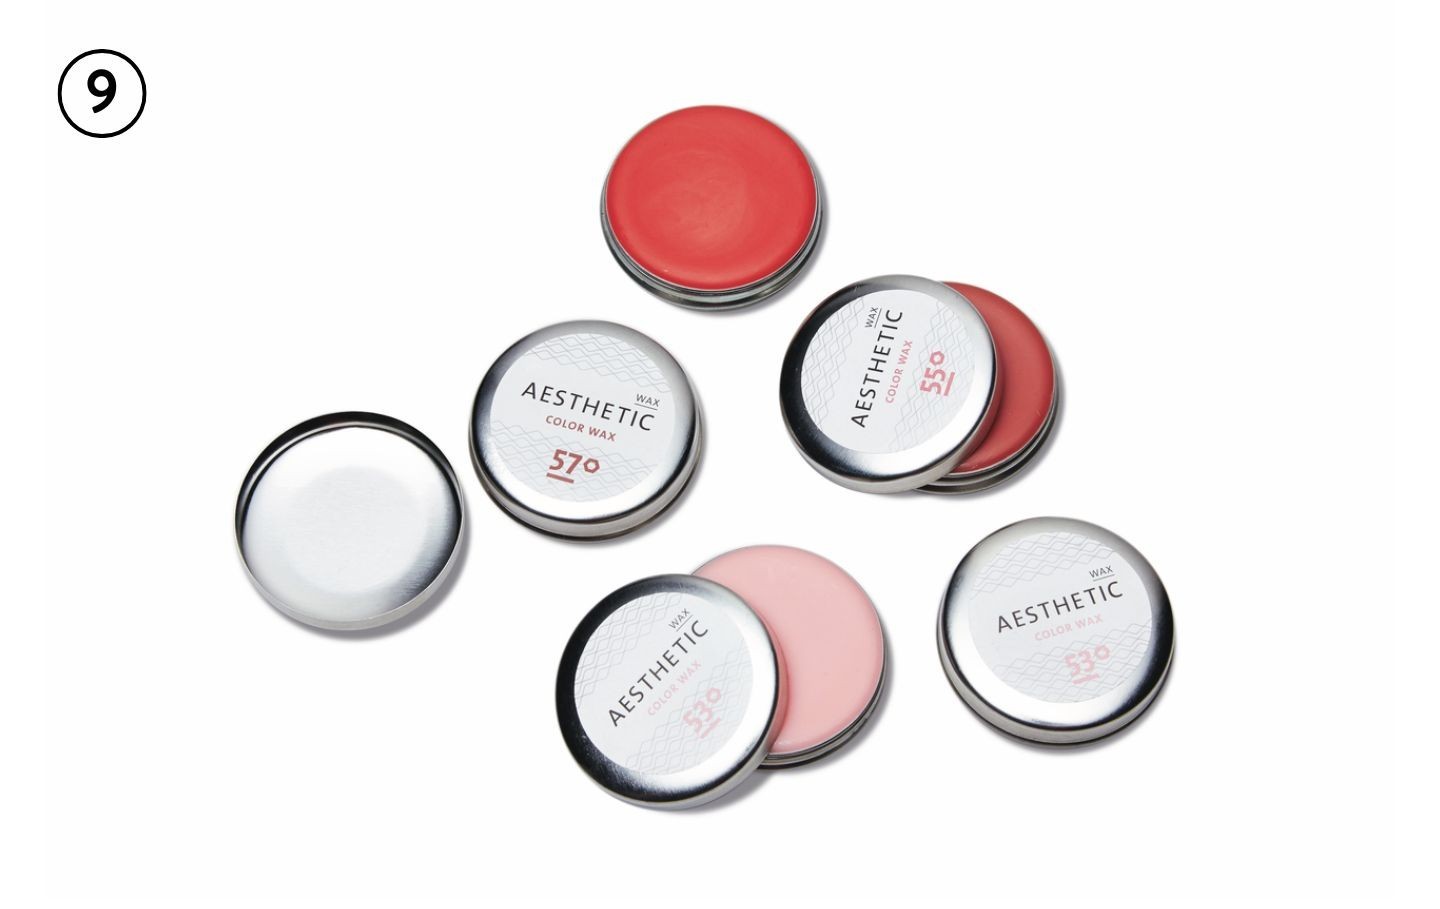
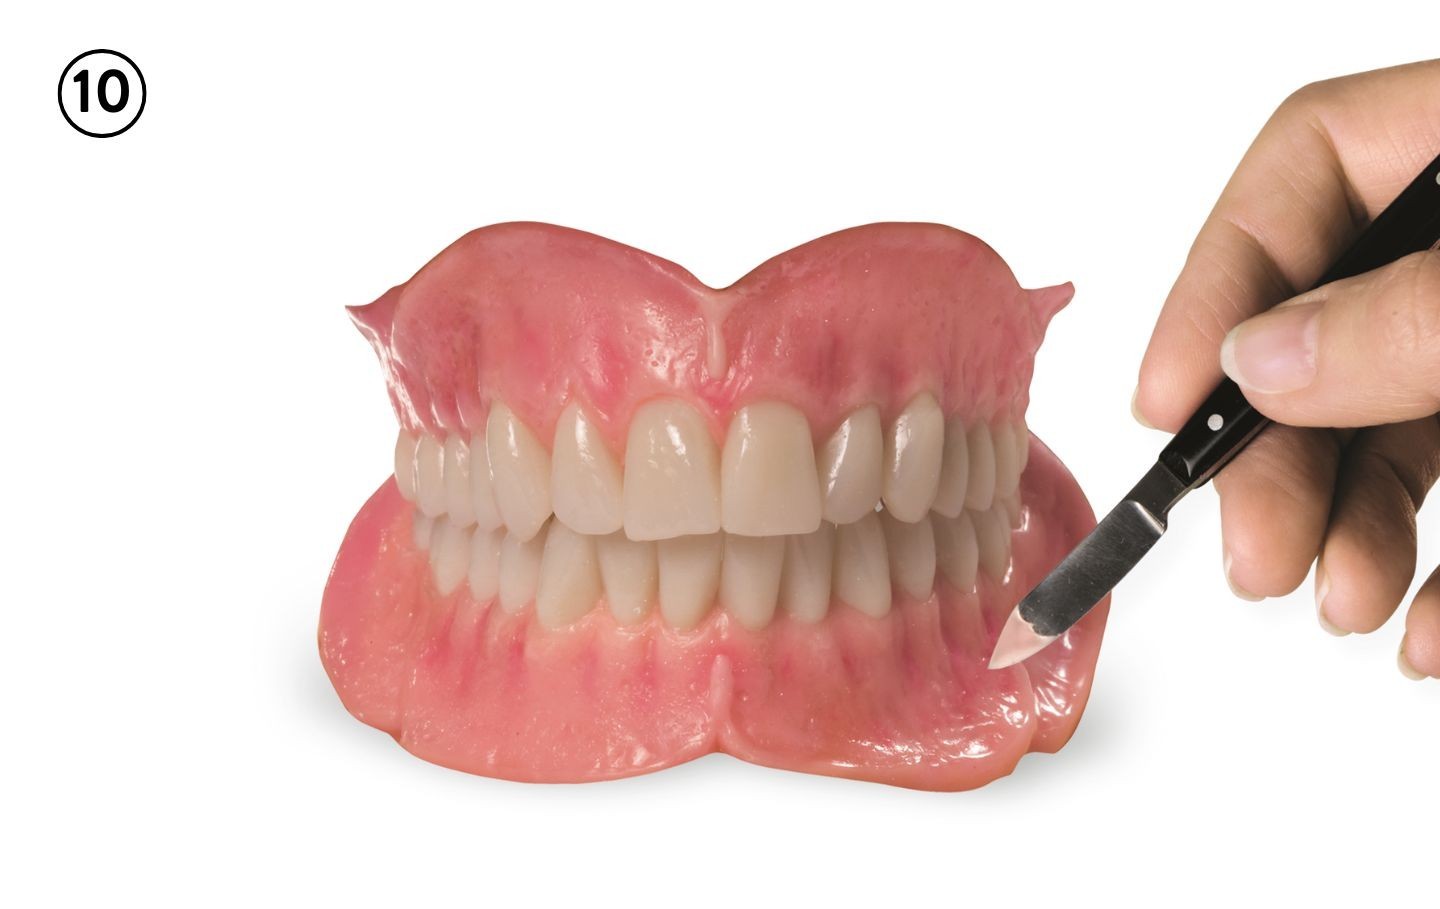
The wax model should already be designed for the final try-in so that it exactly matches the future denture base in terms of dimension and color. To achieve an individual, age-appropriate gingiva, pre-stained waxes are used that match the shades of the resins to be used later on (Fig. 9). A whitish pink stained wax is used for the marginal gingiva. On the other hand, darker, more intensive color shades are used for the attached gingiva and the alveolar mucosa (Fig. 10). Thus, both the dentist and the patient obtain a first impression of the finished denture during try-in.
Fig. 9: AESTHETIC Color Wax - wax stained to match the premixed resins
Fig. 10: Wax-up of the dentures with stained waxes immediately before the try-in
Transformation to resin
Specific resins for transformation are available for both self-curing as well as hot-curing. Processing is very similar in both cases. The difference being that in the self-curing process, the characterization resins are first placed in the flask or precast, and then the base material is mixed and poured. In contrast, for hot-curing, the base material is first mixed to a dough-like consistency, and then the characterization resins are mixed and placed in the flask. During this time, the base material can mature and is ready for the first trial pressing. A third option is to cure and finish the denture in the conventional manner. Shortly before polishing, a little amount of resin is removed from the area to be characterized and replaced with the characterization stains 53, 55 and 57. The base can be created using either the hot or the self-curing method. Only self-curing polymer is used for characterization.
Processing
As the time frame for the self-curing polymer is limited to approx. 6-8 minutes, the workstation and materials should be organized such that the focus when working is exclusively limited to characterization. It is also important that the powder and liquid of the base material are already measured and prepared so that they only have to be mixed following characterization. To gain a little more working time, especially in summer temperatures, we recommend storing the liquid in the refrigerator.
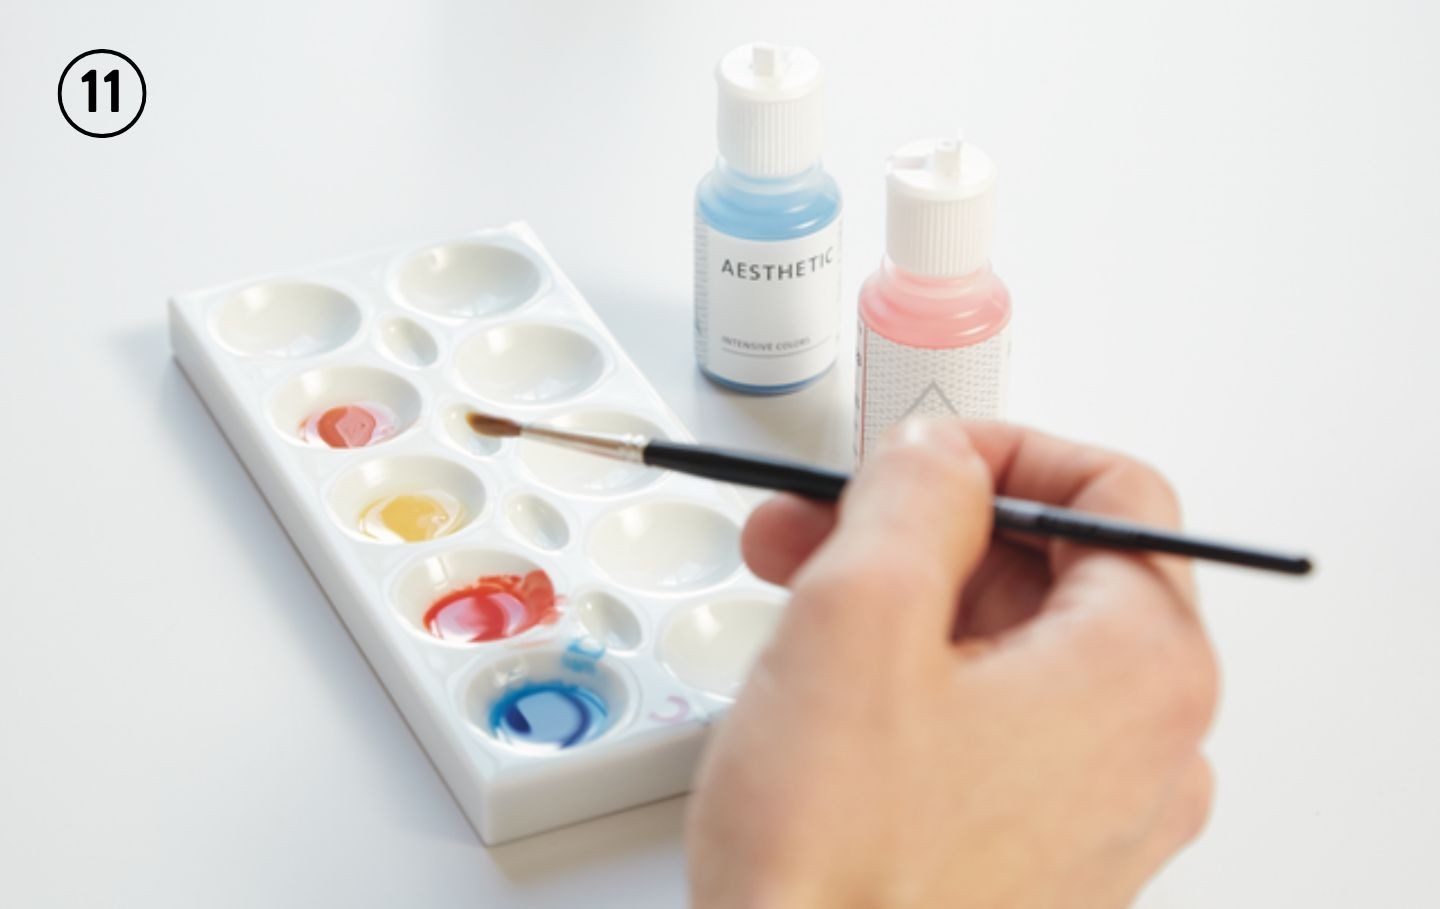
To mix the characterization resin, it is necessary to use the porcelain mixing tray provided in the set. The wells intended for portioning are filled with LT Modelling Monomer according to the number of layers (Fig. 11). When using intensive stains, a small amount (a knife tip) is added to the monomer. With a little practical experience, one can judge to what extent coloration of the resin is influenced.
Fig. 11: When using intensive stains, the pigments must first be mixed into the monomer.
Layering
Then the appropriate stain and quantity of polymer are added to the monomer and mixed thoroughly. If intensive pigments are used, only the base polymer stain 34 is used.
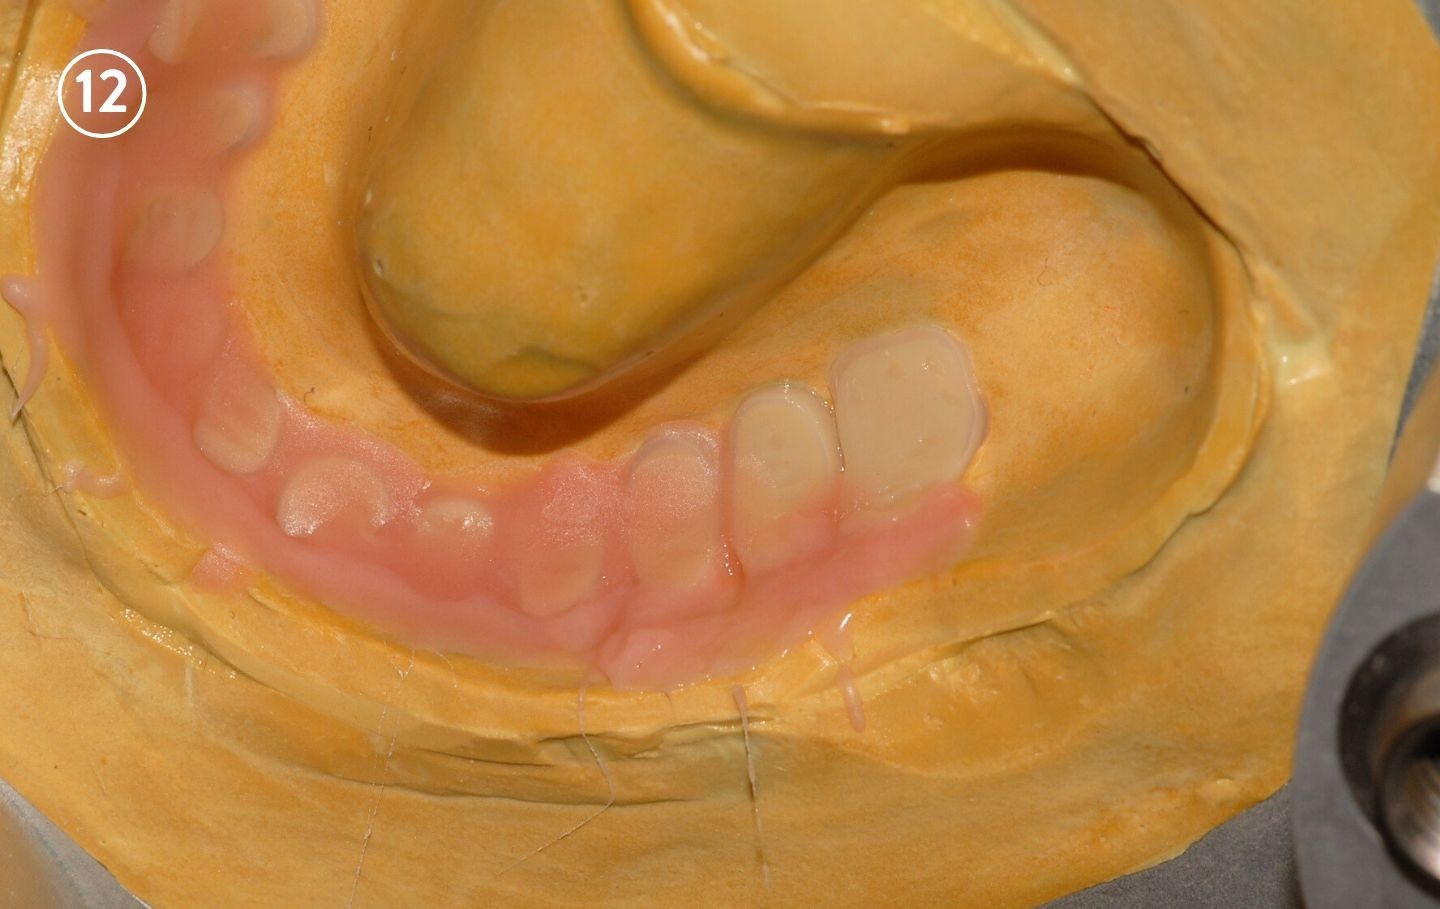
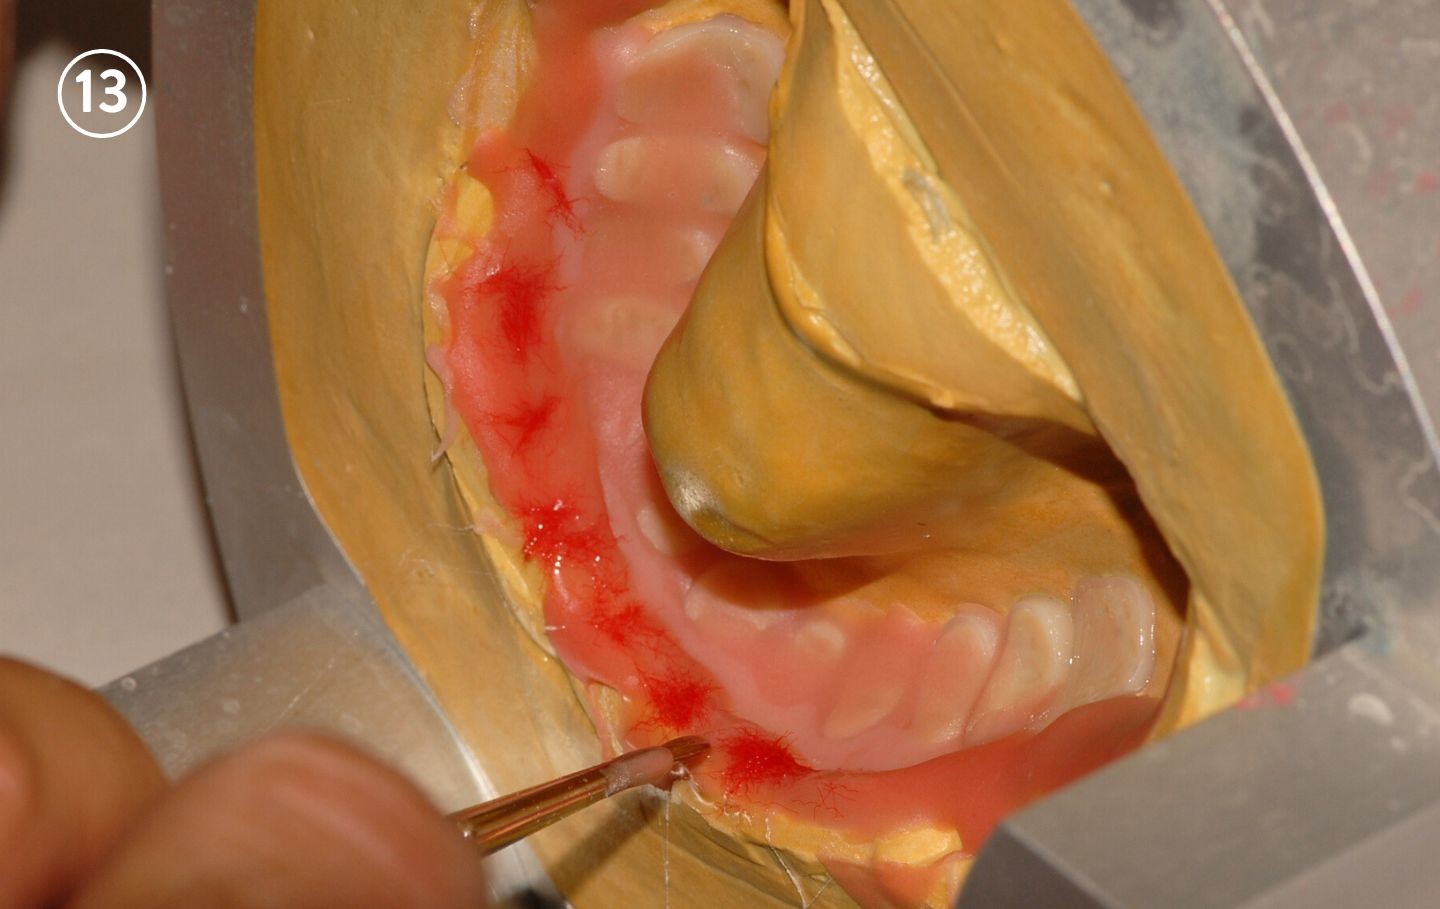
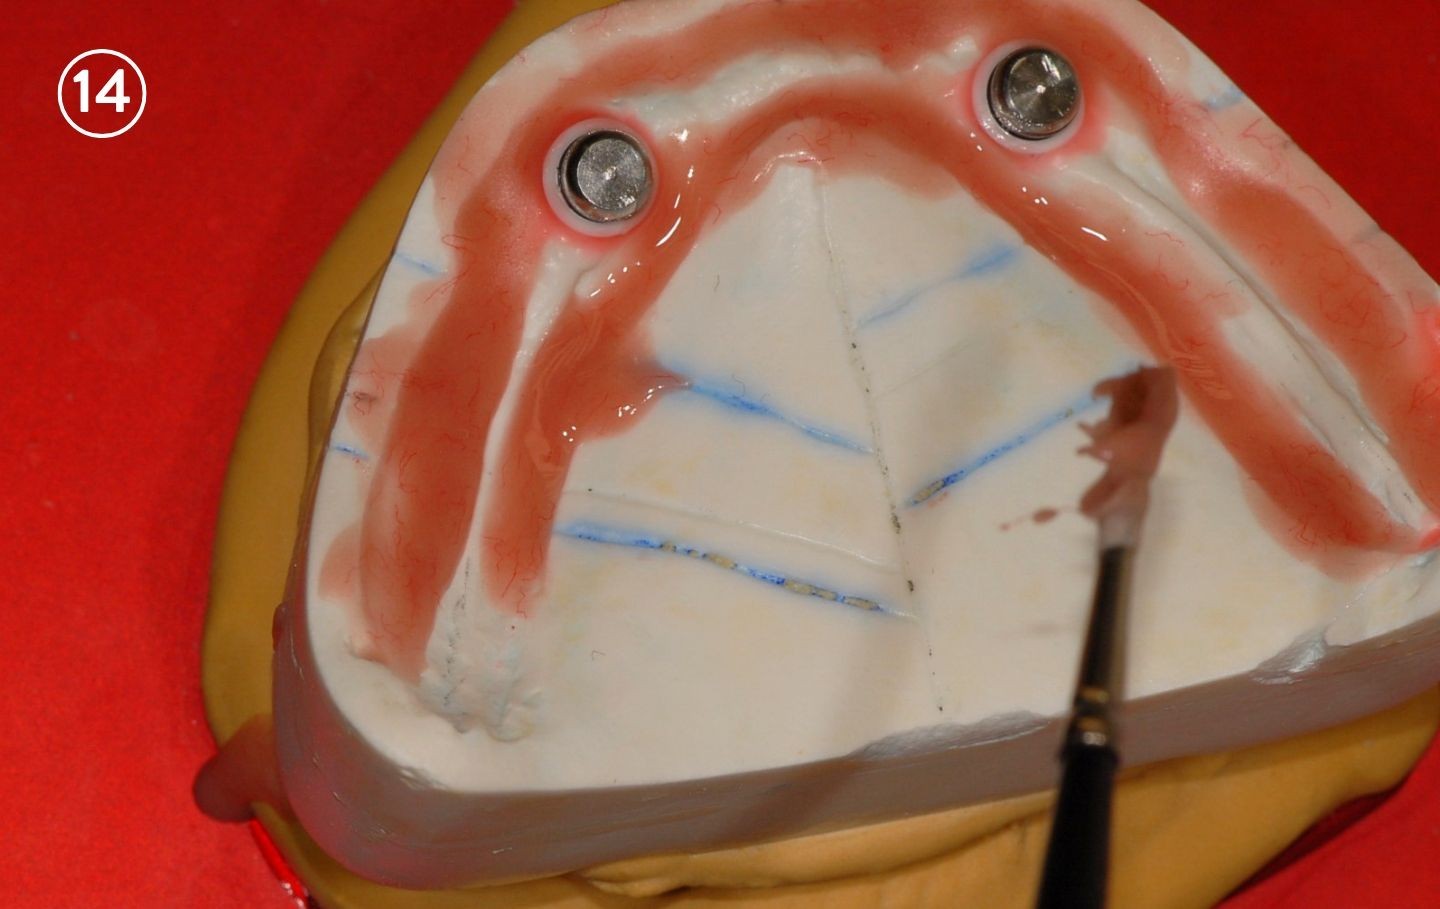
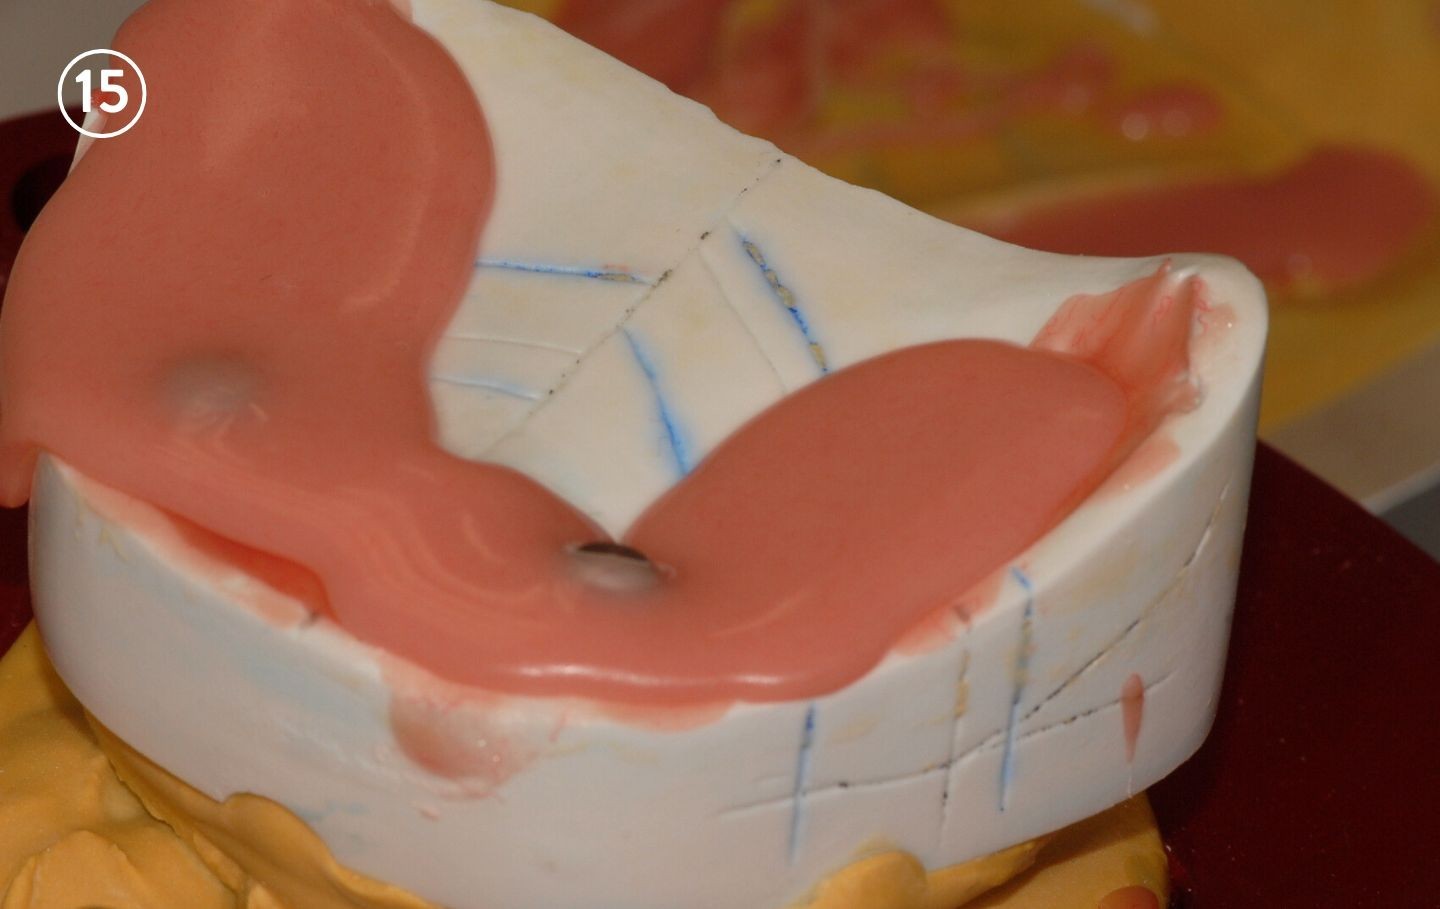
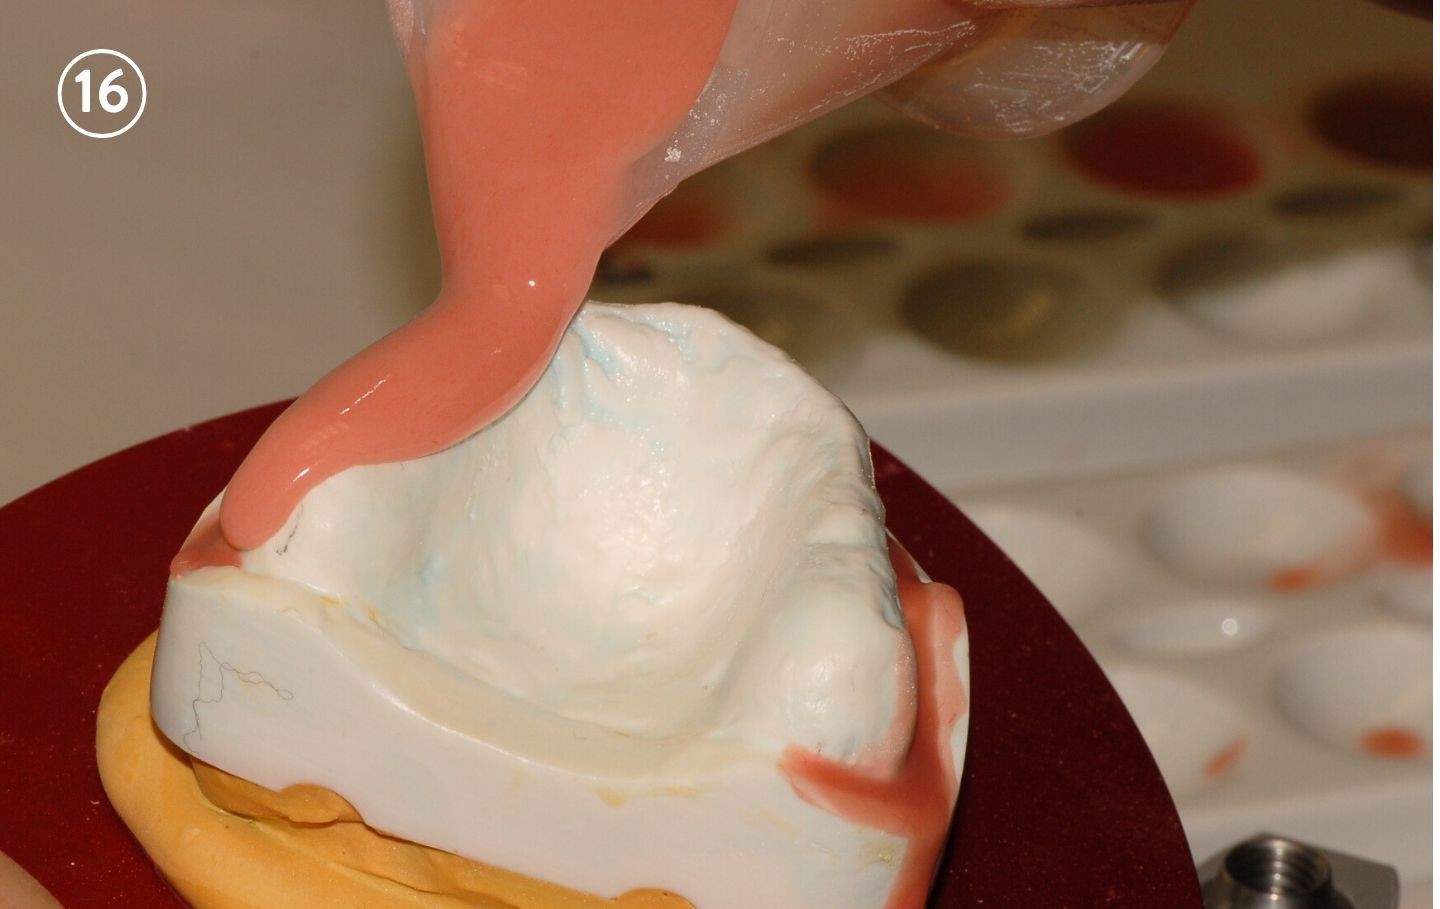
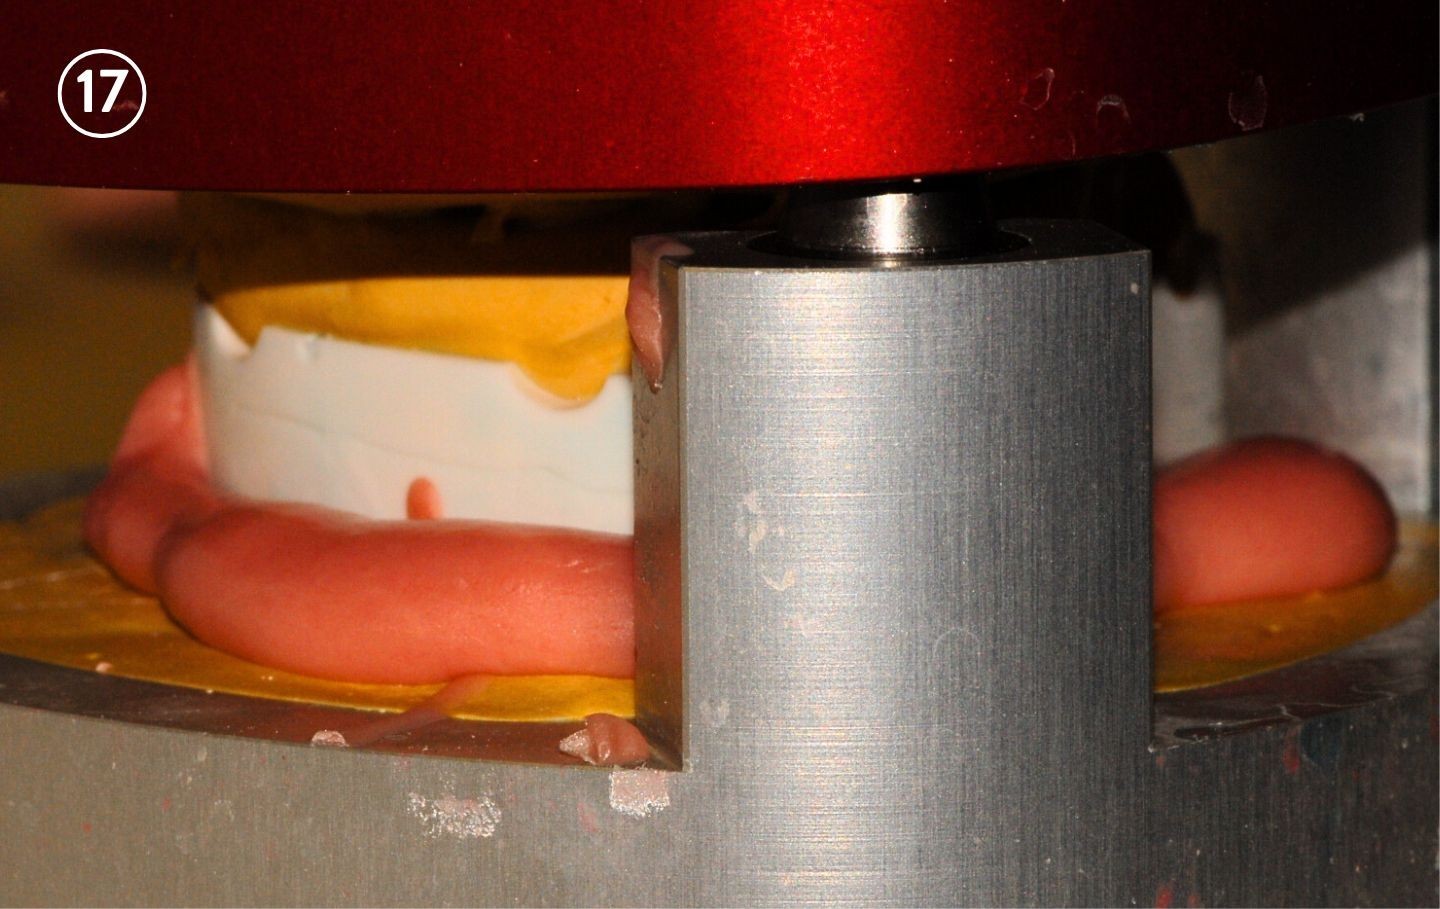
Layer after layer of the characterization resin is then placed in the prepared flask (Figs. 12 to 17). Always start with the stain that is closest to the teeth, then layer the darker stains up to the mucolabial fold. It is important that there is a smooth transition between the individual plastic layers.
Figs. 12 to 17: The layering of characterization resins in the flask
Finalization
Once placement of the characterization has been completed, the base material is poured in employing the self-curing process and closing of the flask is delayed until the polymerizate has reached the correct consistency (same as with relining). All self-curing polymers should be polymerized for at least 15 minutes in a pressure pot at 2 bar.
When applying the hot polymerization process, the base resin is first turned into a dough.
The time required for the polymerizate to achieve the correct consistency for pressing is sufficient for characterization in the flask.
After devesting and functional grinding, one can start finishing the denture. As the layer thickness of the characterization resin is not very thick, these areas should not be ground down too much. If the wax model was perfect, then ideally only fine surface corrections will be necessary before beginning the polishing process.
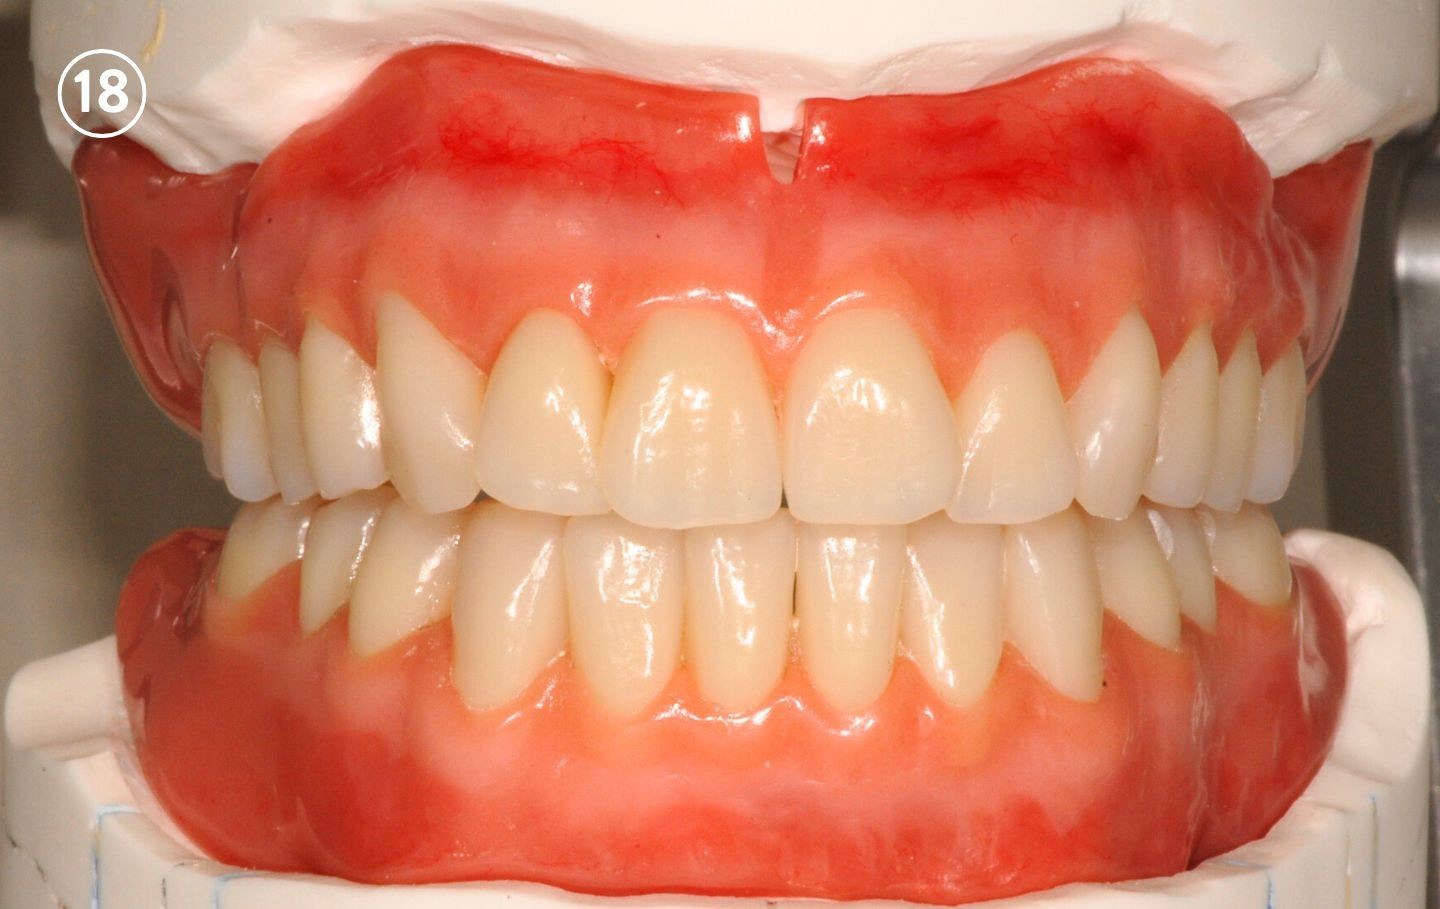
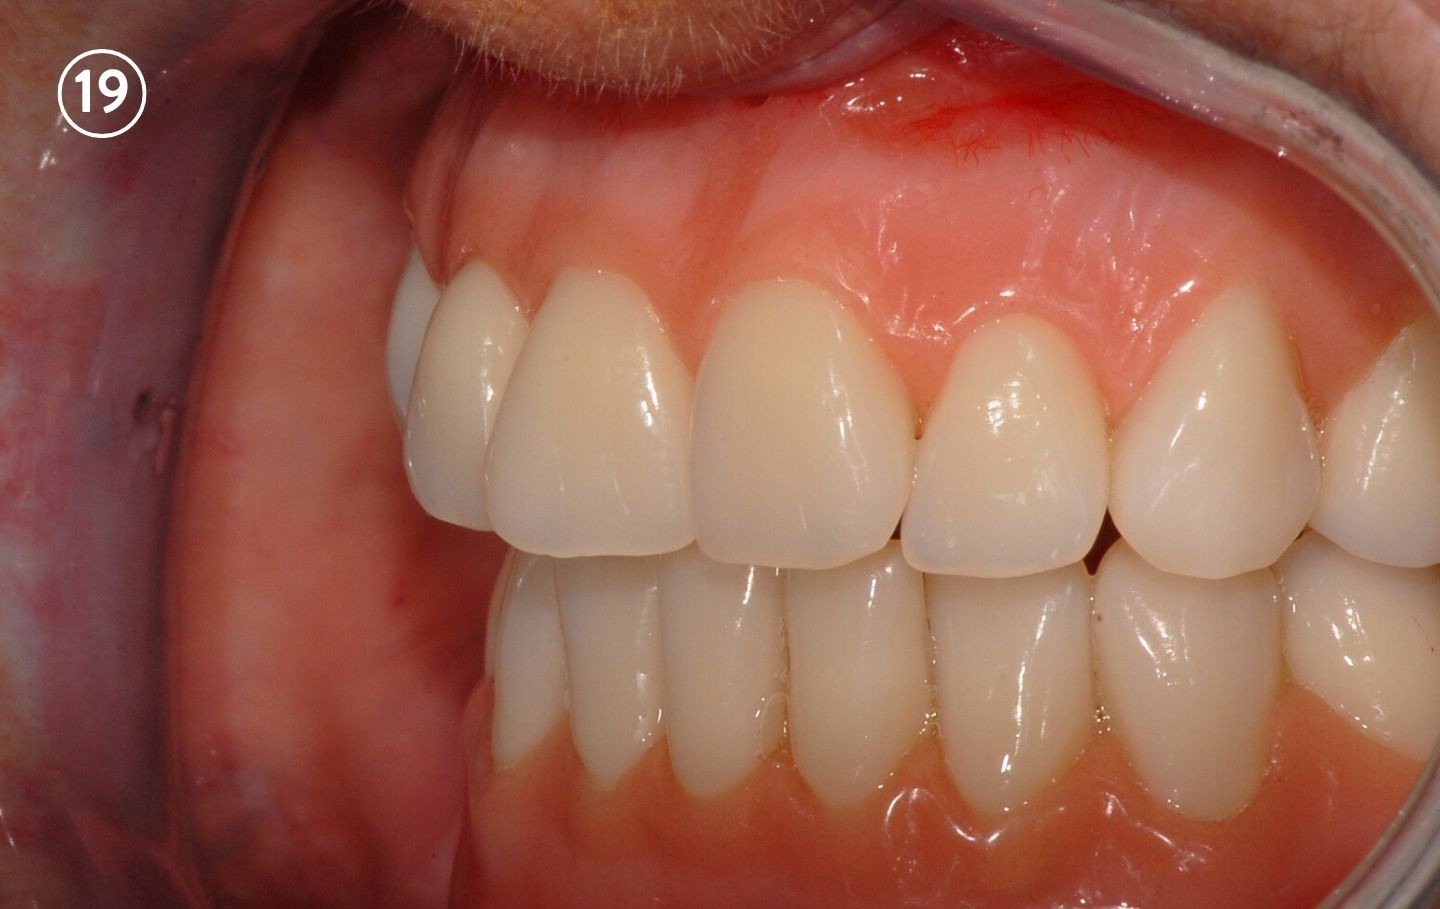
The following figures (Figs. 18 to 20) show the finished dentures during the final steps of the process and then in the patient's mouth.
Fig. 18: The denture after polishing, ready for integration
Figs. 19 and 20: The denture following integration
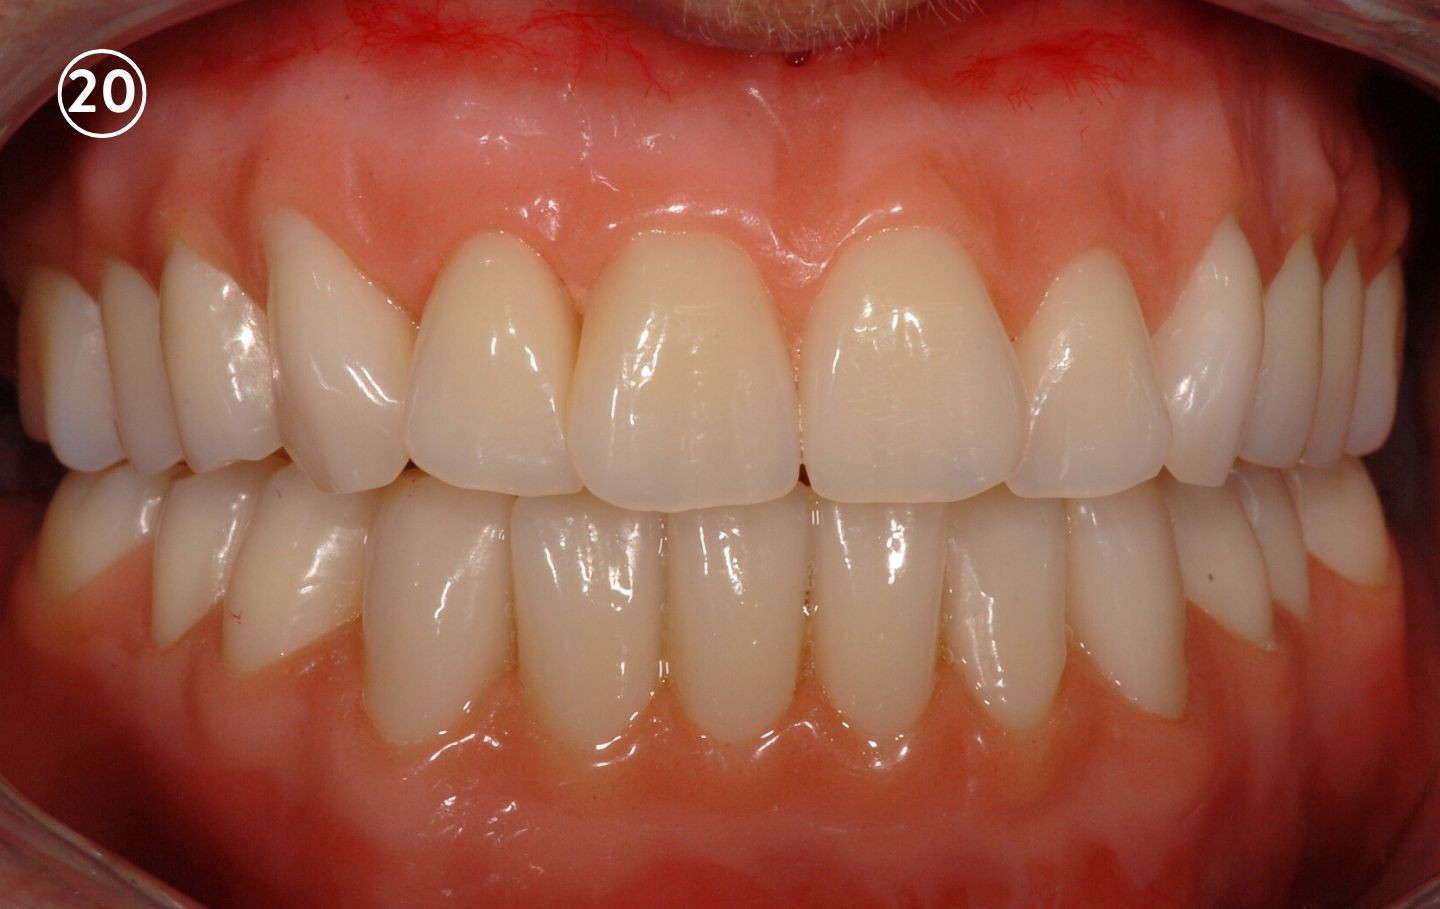
With the procedure presented here, the most diverse color gradations of the natural gingiva can be systematically imitated and, in a relatively simple and straightforward manner, very natural-looking prosthetic work can be implemented, which, as in the presented exemplary case, can be integrated inconspicuously and esthetically in the patient.


